NotificationContent and NotificationService
Introduction
Today I start a series of articles about all extensions that you can add to your iOS project. The first extension that I’ll speak about is … Notification Content and Notification Services. These two are new since iOS 10 and is part of the rework that has been done for this version.
What is an extension ?
In iOS you can extend your app to add new capabilities. There is a lot of them like an apple watch application, iMessage application, spotlight extension, etc…
Notification Services
First of all the Notification Service. It’s goal is to intercept the remote notification and modify it. It can be used to decrypt some informations, download some datas (eg: a picture), and do some stuff that needs a bit of time.
This action is limited in time, so if you didn’t finish what you did, it will use the notification that you received without change.
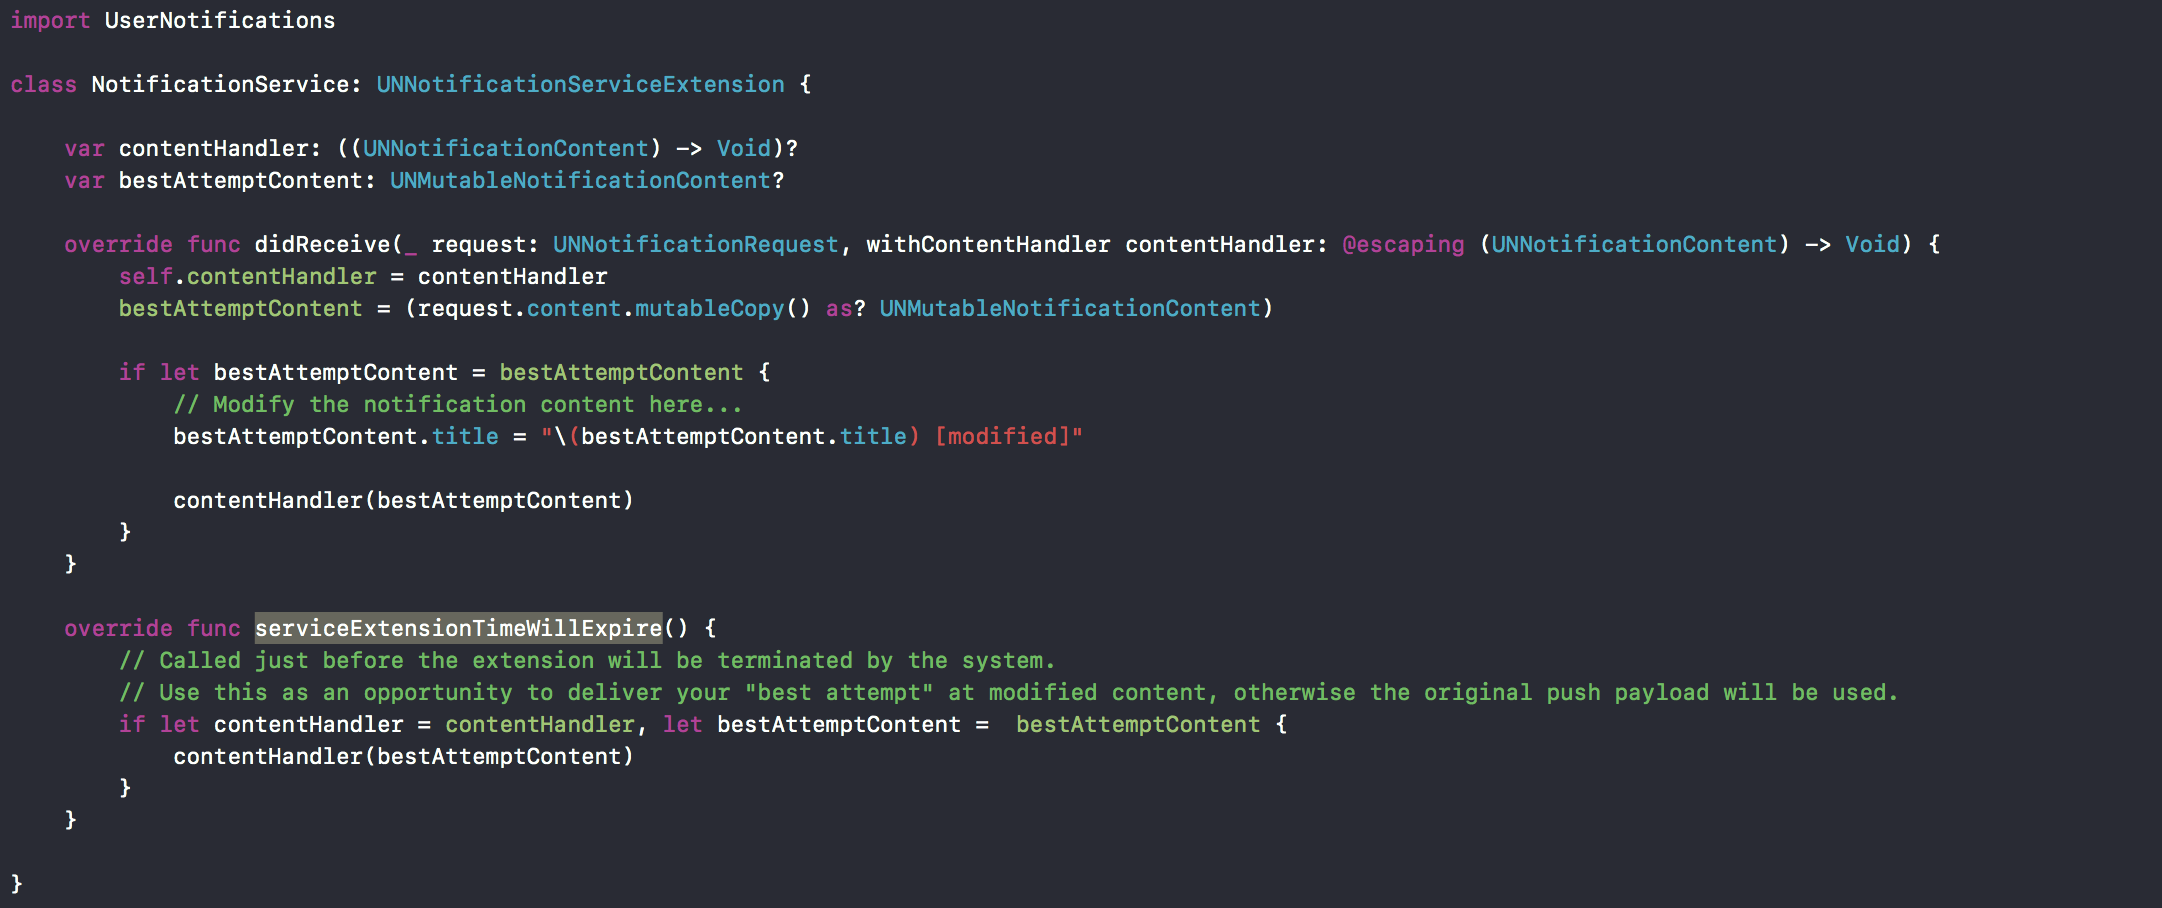
In the code it looks like this :

Notification Service tree
You have two files : a plist file and a swift file. The plist is by default already configured and we don’t need to change it. It says all the informations that your project needs to know, like the main class needed and so one.
The file that will interest us now is the swift file. There is two functions in this file.

Notification Service Swift file
The first one is didReceive(_). This is the one called when your application receive a remote notification, and where you start doing your business. At the end of this one you have to call the closure named contentHandler and received as parameter.
If your application takes some time to process the notification, the second function might be called : serviceExtensionTimeWillExpire(). It is your last chance to change the notification. If you do nothing the notification will be shown as-is. So if for example you encrypt the content and you didn’t had the time to decrypt it, it will show the encrypted content.
Notification content
This extension is used to change the UI of an extension category. You can for example want to make your notifications looks like your brand, with some colors, brandings, fonts.
A great thing is that one notification content extension is for one category. So you can have as many notification content extension as you have categories. The notificationContent view is shown when you forceTouch the notification.
Let’s take a look at what it’s like in the code.

Notification Content tree
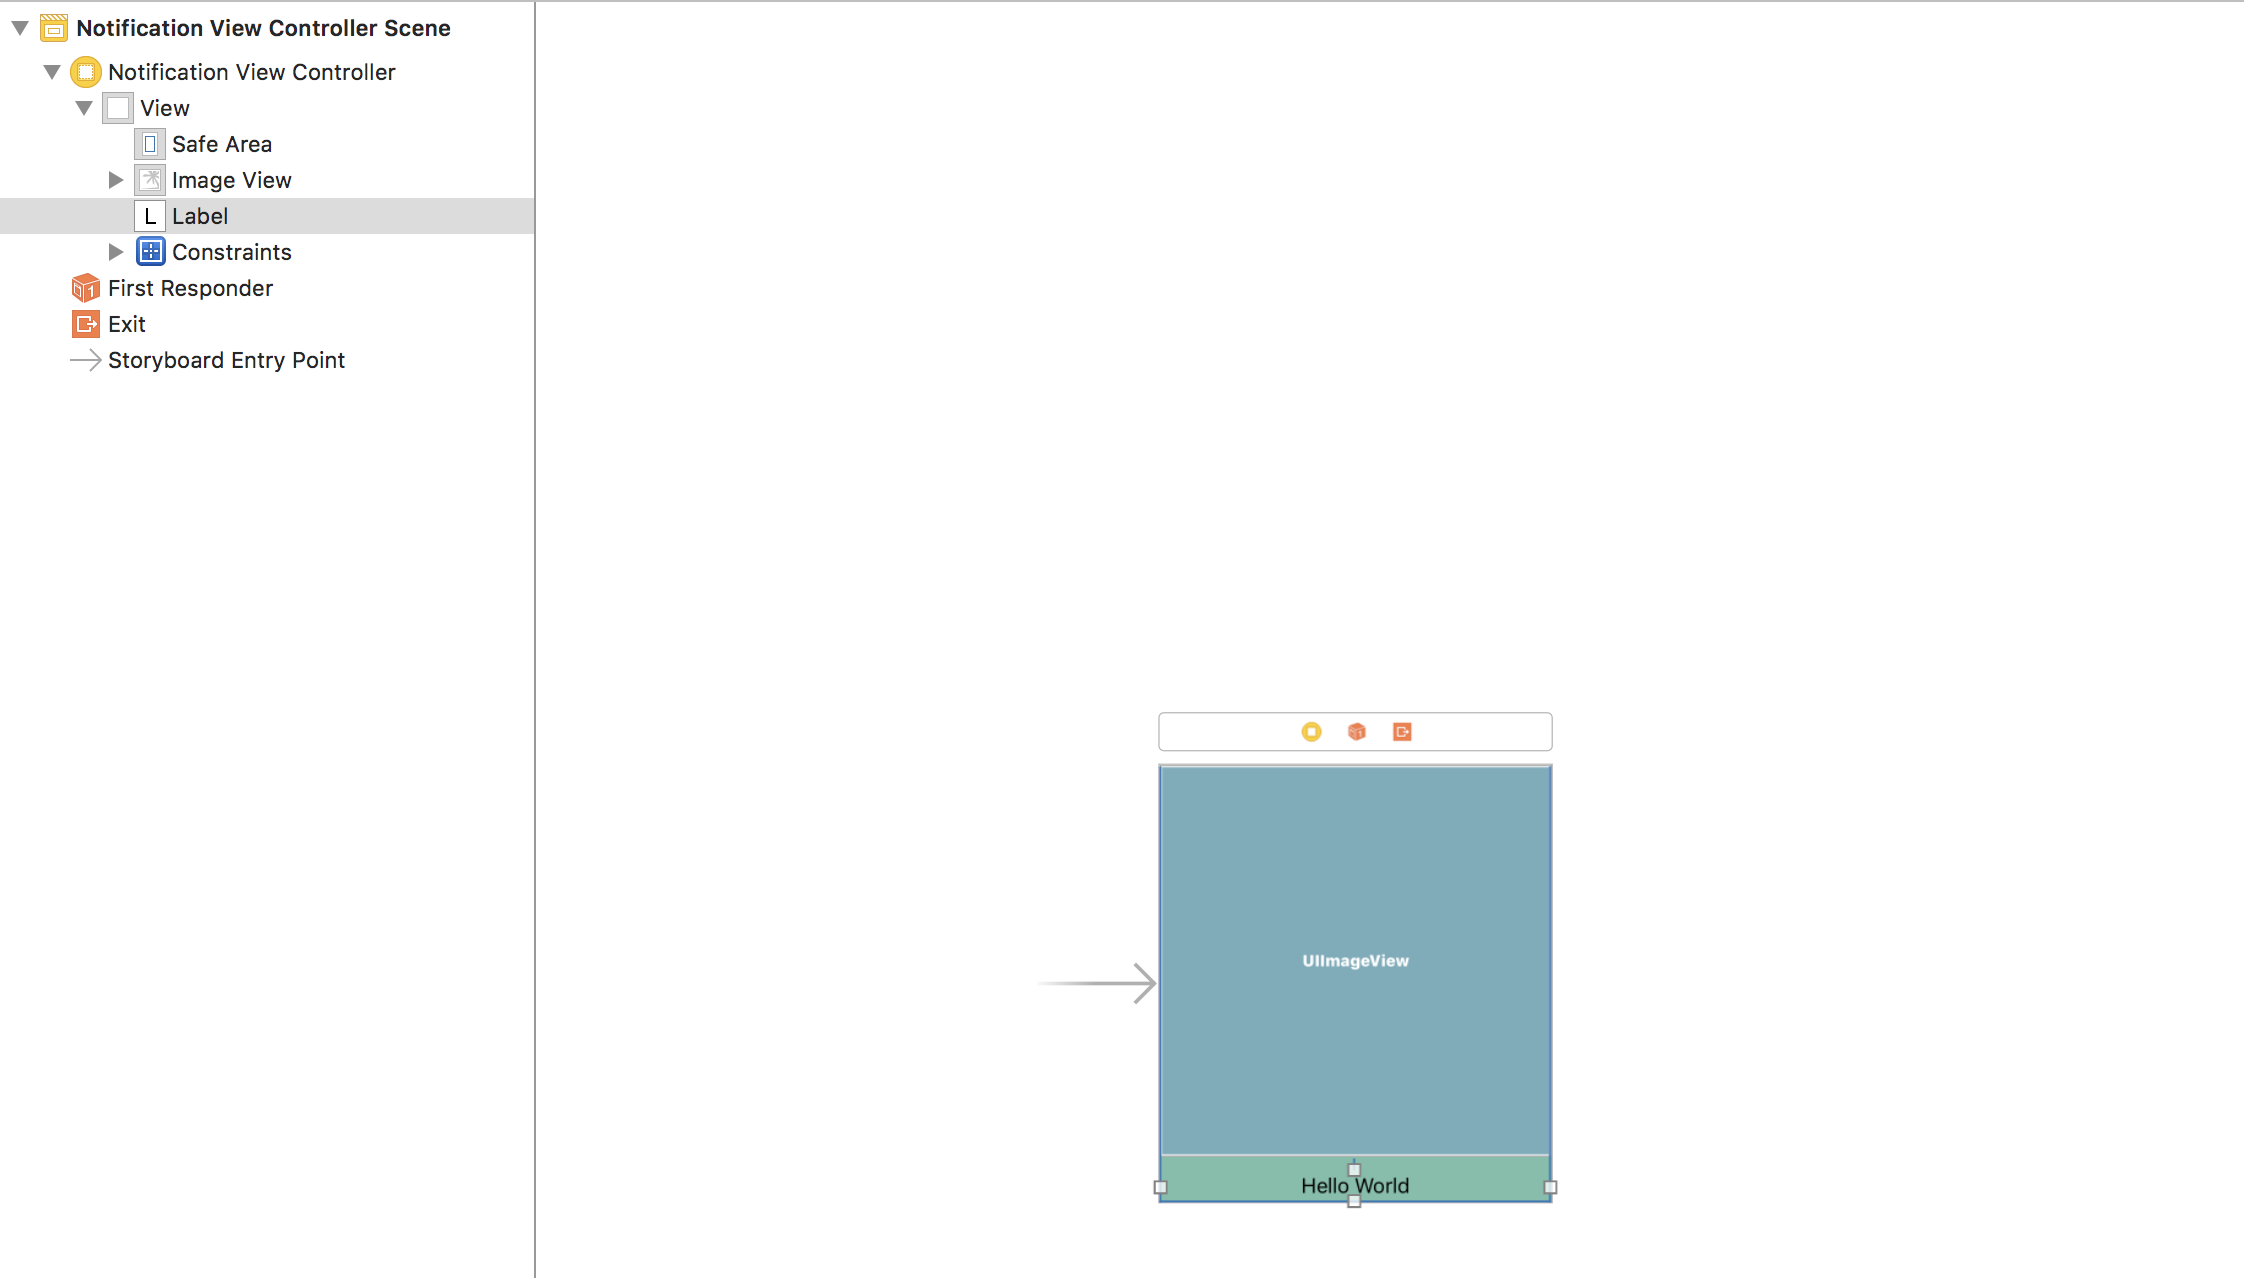
As you can see, you have a storyboard, a plist file and a ViewController file. The storyboard is simply the view that you want to show. You have a NotificationViewController and you can add whatever you want. In my example, I added a UIImageView.

Notification Content Storyboard
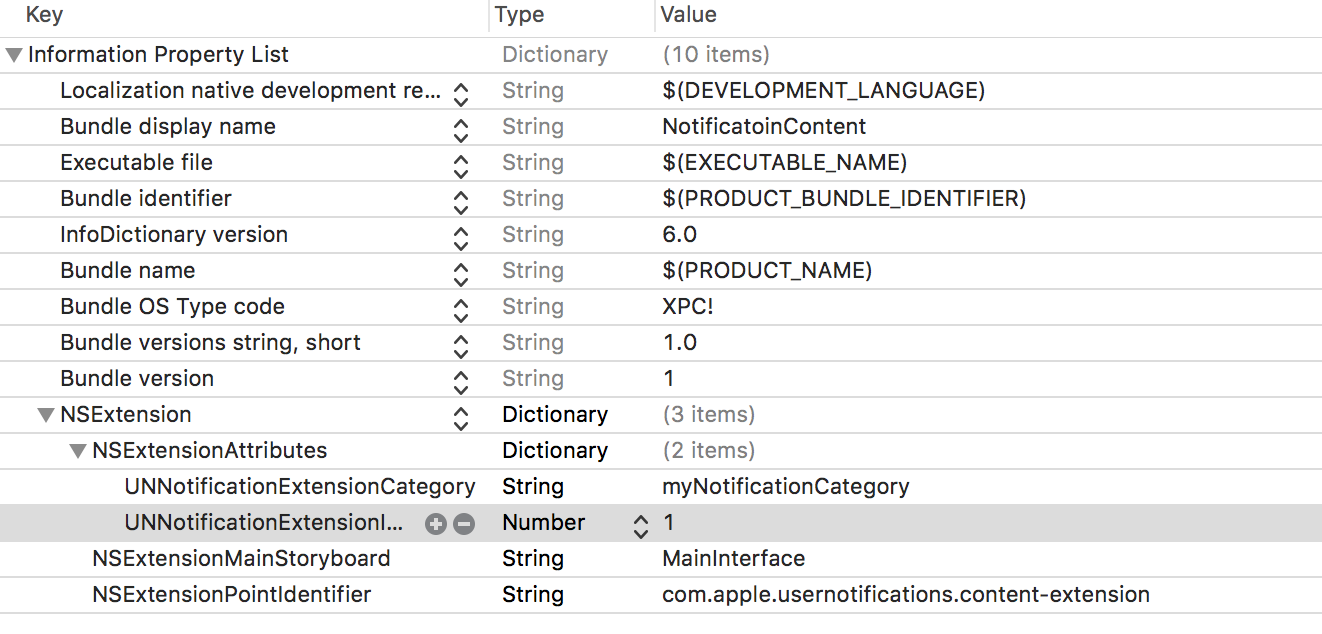
In the plist file we will add some informations like the category that we support, the initial ratio of the notification and the hide default content. It’s the three informations that we usually change.

Notification Content Plist
Now the most important file, the ViewController. The ViewController inherit from UNNotificationContentExtension to get the didReceive(_) function. You have to important functions that is the didReceive(_) function and the viewDidLoad() function. You can add the logic of your view in the viewDidLoad and the logic that needs your notification info in the didReceive. In my example I add a static image in the viewDidLoad, in real world it can be the brand logo for example. And in my didReceive I add a text that is received from the notification.

Notification Content ViewController
Conclusion
As you can see the notifications can be changed easily. You can find the example project here :
https://github.com/coutar-t/pushnotificationexample
I hope this article helps you start with this and that you can now play with the notifications. Let me know in twitter if it was helpful for you or if you have any questions. :)
